第一步:准备测试图片和测试模型

准备好一张需要测试的图片和训练好的测试模型,放到测试文件夹中

第二步:测试代码

1
2
3
4
5
6
7
8
9
10
11
12
13
14
15
16
17
18
19
20
21
from PIL import Image
from torchvision import transforms
import torch
from torch.autograd import Variable
#加载测试模型
model = torch.load('C:/Users/Arthur/Desktop/test/model.pth')
#加载测试图片
test_img = Image.open('C:/Users/Arthur/Desktop/test/12.png')
#图片变换
transform = transforms.Compose([transforms.Resize((224,224))
,transforms.ToTensor()
,transforms.Normalize([0.485, 0.456, 0.406], [0.229, 0.224, 0.225])])
test_img = transform(test_img)
#增加一维度
inputs =Variable(torch.unsqueeze(test_img, dim=0).float(), requires_grad=False).cuda()
outputs = model(inputs)
#经过sofamax层后输出概率
probability = torch.nn.functional.softmax(outputs,dim=1)
#找出最大概率和相应的标签
max_value,index = torch.max(probability,1)
print(probability,max_value,index)

注:

  1. 测试图片的尺寸需要和训练尺寸相同,并且也需要进行张量变换(ToTensor)和归一化(Normalize)。
  2. 由于pytorch要求的输入的维度为[batch_size, channels, width, height],而一个样本的维度为[channels, width, height],此时因为我们需要测试一张图片,所以用unsqueeze()增加一个维度变为[1, channels, width, height]。
  3. index只能给你一个数字,它其实代表的是第几个类别,如果想知道具体类别名称,可以打开训练集的文件夹,那么0就是第一个类别,1就是第二个类别…….以此类推。比如以下是我的训练集。
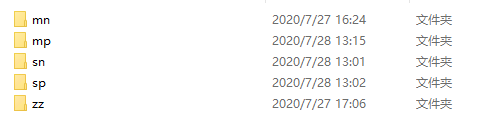
    训练集文件夹
    那么mn就是第0个类别,mp就是第一个类别。